
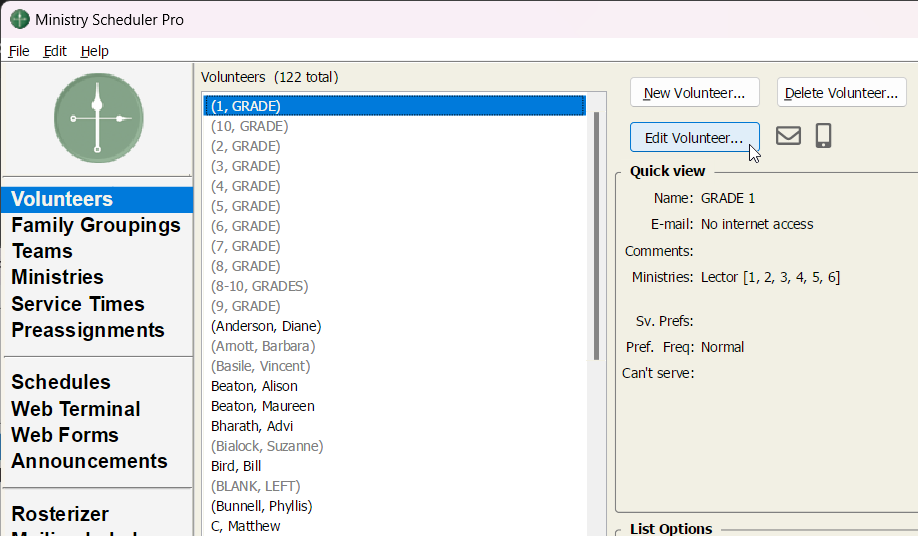
1. Edit any volunteer
- Open Ministry Scheduler Pro
- Edit any volunteer
Open Ministry Scheduler Pro.
Make sure "Volunteer" is selected in the left-hand column.
Click on the "Edit Volunteer" button.
1. Edit any volunteer
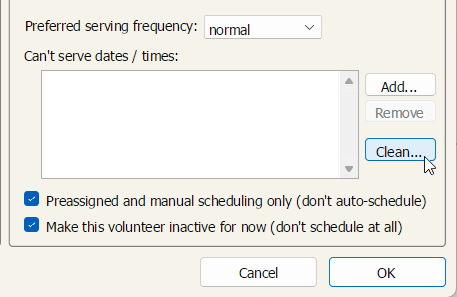
2. Request cleaning of passed dates
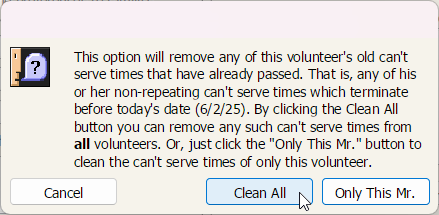
3. Clean all volunteers' dates
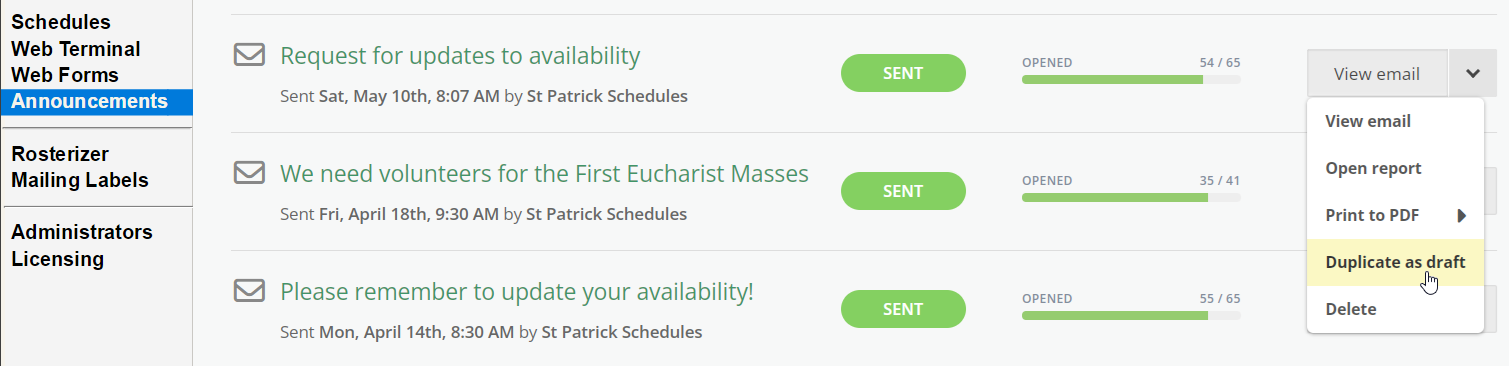
4. Duplicate the most recent Request for updates to availability email
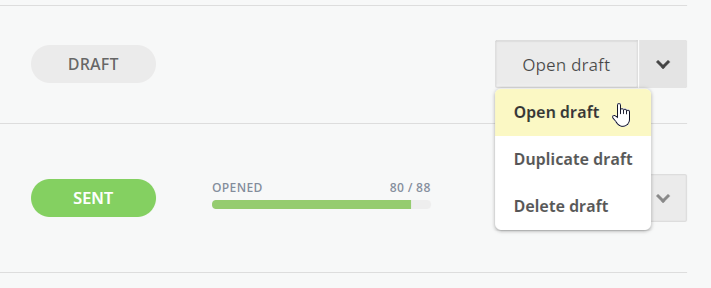
5. Open the draft for editing
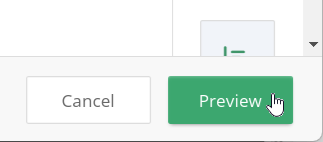
6. Open the preview window
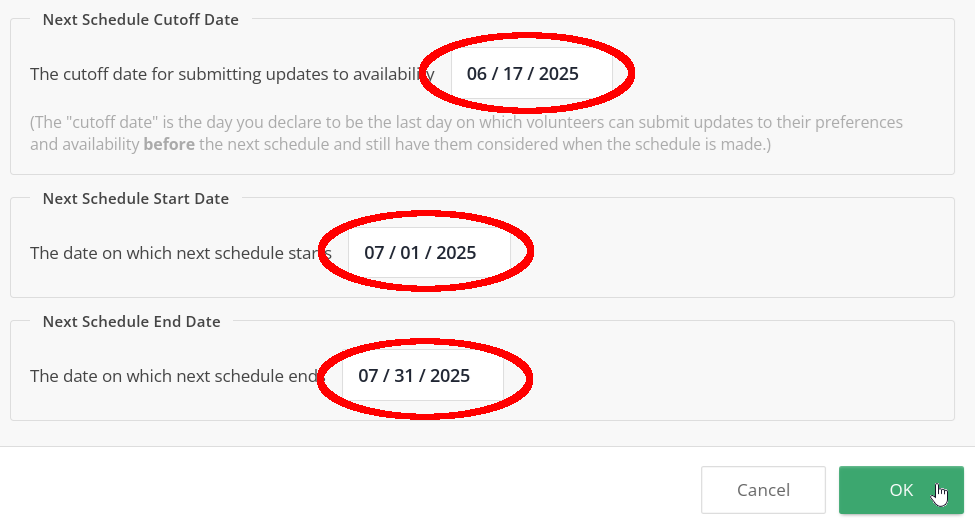
7. Update the date fields
8. Confirm the correct dates
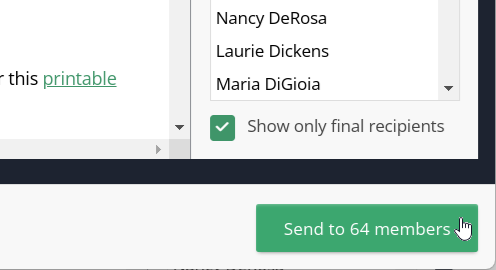
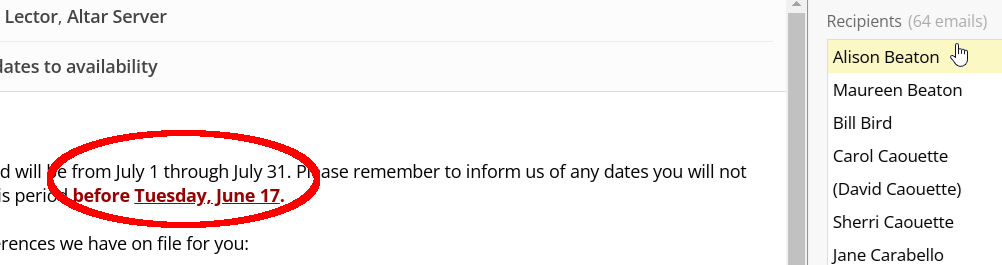
9. Send the emails
Sed do eiusmod tempor incididunt ut labore et dolore magna aliqua. Ut enim ad minim veniam, quis nostrud exercitation ullamco laboris nisi ut aliquip ex ea commodo consequat. Duis aute irure dolor in reprehenderit in voluptate velit esse cillum dolore eu fugiat nulla pariatur. Excepteur sint occaecat cupidatat non proident, sunt in culpa qui officia deserunt mollit anim id est laborum. Lorem ipsum dolor sit amet, consectetur adipiscing elit, sed do eiusmod tempor incididunt ut labore et dolore magna aliqua. Ut enim ad minim veniam, quis nostrud exercitation ullamco laboris nisi ut aliquip ex ea commodo consequat. Duis aute irure dolor in reprehenderit in voluptate velit esse cillum dolore eu fugiat nulla pariatur.
Excepteur sint occaecat cupidatat non proident, sunt in culpa qui officia deserunt mollit anim id est laborum. Lorem ipsum dolor sit amet, consectetur adipiscing elit, sed do eiusmod tempor incididunt ut labore et dolore magna aliqua. Ut enim ad minim veniam, quis nostrud exercitation ullamco laboris nisi ut aliquip ex ea commodo consequat. Duis aute irure dolor in reprehenderit in voluptate velit esse cillum dolore eu fugiat nulla pariatur. Excepteur sint occaecat cupidatat non proident, sunt in culpa qui officia deserunt mollit anim id est laborum. Lorem ipsum dolor sit amet, consectetur adipiscing elit, sed do eiusmod tempor incididunt ut labore et dolore magna aliqua. Eros in cursus turpis massa tincidunt dui. Etiam tempor orci eu lobortis elementum nibh tellus. Erat nam at lectus urna. Viverra accumsan in nisl nisi scelerisque eu. Tincidunt nunc pulvinar sapien et.
This is paragraph text. Click it or hit the Manage Text button to change the font, color, size, format, and more. To set up site-wide paragraph and title styles, go to Site Theme.


Making a new schedule
Creating the schedule blank
1. Go to Service Times and update any services that fall in the month
2. Go to Schedule, under Create a new schedule set the Start and End dates as desired and click Create...
3. Click OK on the Service Naming Settings information box
4. In the Service Naming Settings box, click on Automatically name my services according to the Roman Catholic liturgical calendar and click OK
5. Click on File and Save, and click OK to accept the defaults
6. Click on OK in the This schedule has been saved information box
7. For each Sunday, click on the 8am Mass and click Edit Resources
8. Click Add another resource and choose Add a link from the dropdown box
9. Enter the name of the service and a link to its website (see below for how to get these), choose "this service as well as all related services this week" in the Show this resource box and click Save
10. Click the black X in the upper right corner to dimiss the Edit Resources dialog
* If the month ends on a Saturday, select the 4pm Mass on the final Saturday and follow steps 8-10 above, using the date of first of the following month.
How to get the Mass Names and Links for Edit Resources
1. The link to the Mass is in the form https://bible.usccb.org/bible/readings/mmddyy.cfm
2. The name of the Mass is on that page just about the Lectionary reference
Populating any special positions
You should receive the Deacons schedule for the month from Deach Frank Dello Russo. Enter in the deacon assignments:
1. Select each Mass in turn.
2. Click on the Deacon slot and double-click the deacon's name in the right-hand column (dc = David Caouette; dfd = Frank Dello Russo; af = Anthony Foti; ch = Charles Hanafin)
3. If you get the warning that the deacon was scheduled close to this one, click Yes
4. If you get the question about other volunteers in the family who could be scheduled, make sure "Always assume this answer" is checked and click No Thanks
5. After all Deacon assignments are entered, review all before exiting the Schedule